3.9 KiB
Clocking
This page describes ways to set up clocking. Official documentation references:
In general, any RF card and Carriers require some clock source. Most of them have both internal clock signal generator and external MMCX and/or SMA connectors to accept the signal. By default the internal clock is used for Carriers, and external MMCX is used for RF cards. However, internal clock may be not good enough for the end-user application, so the end-user may want to change the clock source at any time.
Kasli/Kasli-SoC
For setting clocking on the Carriers you will just need to set rtio_clock in the core device config. Be aware, that
setting any external clocking will require appropriate external clock signal to be supplied into CLK IN SMA connector
on the front panel to boot. Therefore, firmware will be halted, the ERR LED will be red and no Ethernet connection
will be established. Since the clock signal is distributed by DRTIO, there is generally no need in setting it up on
satellites.
If you have connection with the Carrier, you can use coremgmt command:
artiq_coremgmt config write -s rtio_clock <OPTION>
For available options refer to the official documentation (at the top of the page).
Setting clocking for Kasli without connection
For RISC-V/legacy Kasli you will just need to connect your PC to the Kasli via data micro-USB cable and run the following:
# you may also change IP setting here, the default is 192.168.1.75
artiq_mkfs kasli.config -s ip xx.xx.xx.xx -s rtio_clock <OPTION>
# but don't forget to update `core_addr` variable in the device_db.py file if changed
artiq_flash storage -f kasli.config
Be aware that all other settings will be erased, so you may need to restore them in the artiq_mkfs command.
Setting clocking for Kasli-SoC without connection
For this you will need to eject micro-SD card from the Kasli-SoC, either
by removing the top panel or by gently pulling the Kasli-SoC from the crate,
possibly with other cards. In any case, be cautious and follow
the warnings. Once accessed the micro-SD card, simply
add rtio_clock=<OPTION> on a new line to the existing CONFIG.TXT file and save it, or if it is absent, just download
default-ish CONFIG.TXT to the SD card near (same level) boot.bin file.
RF Devices (Except Clocker)
If you want to set the clock source specifically for RF devices, you will just need to update the JSON file and regenerate device_db.py file.
For example for Urukul, you will just need to check the manual for available variants and apply them in the JSON file, so Urukul entry may look like this:
{
  "type": "urukul",
  "dds": "ad9910",
  "ports": [1, 2],
  "refclk": 10e6,
  "clk_sel": 1
}
So basically, clk_sel and refclk fields need to be set:
clk_selselects the source clock, where 0 - internal 100MHz XO; 1 - front-panel SMA; 2 internal MMCXrefclk- reference clock frequency in Hz
These settings may need to be checked with official manual and may differ from device to device.
Clocker card
Main page: clocker.md
Clocker card allows to distribute clock signal up to 1 GHz without additional software setup. Therefore, there is no way
to set it to generate signal, which would be different from input. The only setup allowed is to set to accept signal
from EXT/INT ports, front-panel SMA or card's MMCX ports respectively, by switching the CLK SEL switch on the
card 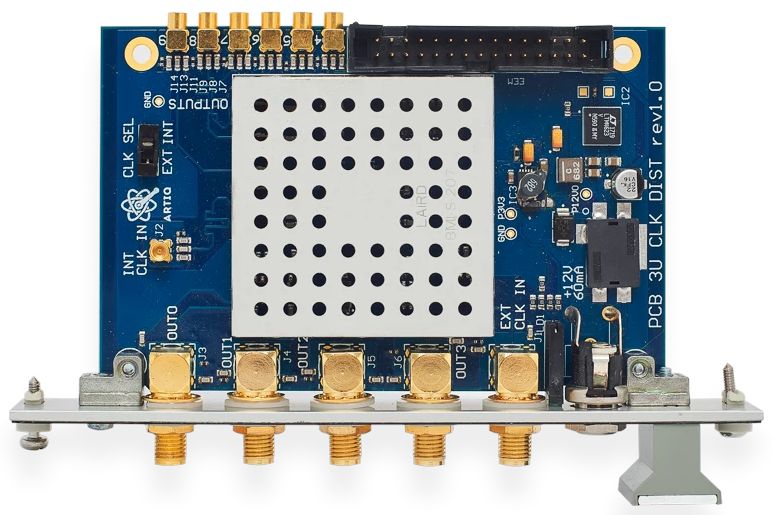 .
.