2.8 KiB
2.8 KiB
Sinara 7210 Clocker
JSON
Not present in the JSON.
Peripherals typically should choose "clk_sel": 2 for MMCX connection and "clk_sel": 1 for external SMA connection.
Refer to the official docs by searching for clk_sel.
You may also need to add "refclk": <number> field to the target card.
Setup external clocker
For tests, you may need an external RF generator, depending on customer needs. Here is example setup for SynthNV RF signal generator:
- Connect SynthNV to the workstation via USB, and
- Install and run
cutecom:nix-shell -p cutecom - Set settings as on the picture below:

- Open the device, usually it is
/dev/ttyACM0 - Put
?intoInputfield and pressEnterfor current settings and help commands - For changing the frequency, enter
f<freq in MHz>, e.g.f125.0for 125 MHz - Set RF power so that clocker would recognize the signal with
a<power>command, e.g.a63 - Check for desired amplitude and frequency at the
RFOut(see picture below for reference) pin via oscilloscope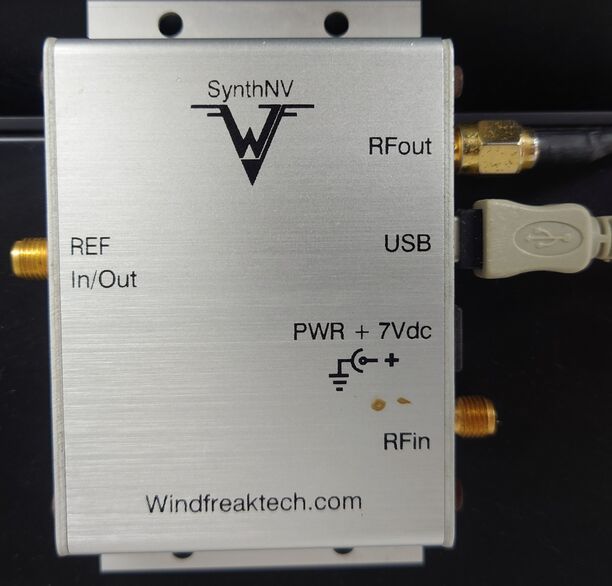
- If everything is ok, connect
RFOutto theCLK INon the Clocker (see instructions below for details)
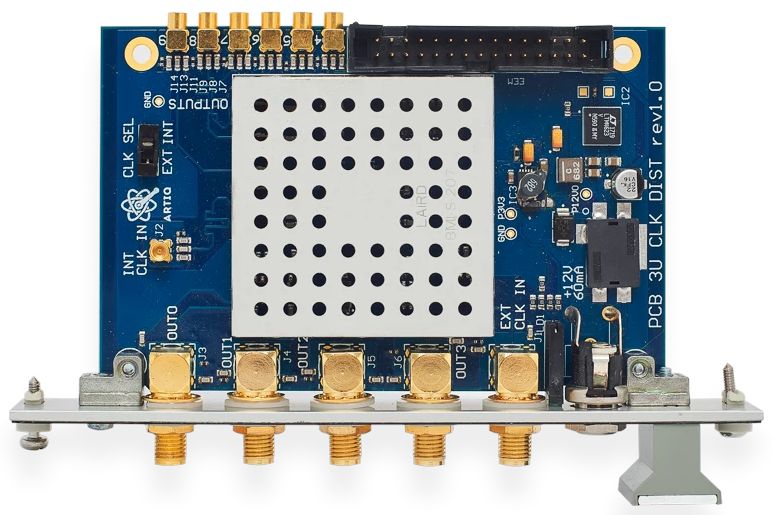
Setup the Clocker
- Switch
CLK SELpin toEXT/INTaccording to customer needs - Connect MMCx cables according to the customer needs and boards specifications (see image below for reference):
if the
INTsource is chosen, connect MMCx cable toINT CLK, otherwise connect external clocker to SMAEXT CLK - Connect the Clocker to the Kasli via 30-pin ports, or via external power supply
- Connect the Clocker's SMA output to the Kasli's
CLK/CLK INSMA pin - After assembling the crates and flashing the firmware, start Kasli and set config if needed:
artiq_coremgmt config write -s rtio_clock ext0_bypass. Please refer to the official manual for the details and available options. In most cases you may skip this step. - Reboot either via
artiq_coremgmt rebootor via power supply if the board's firmware doesn't have such command
Testing
Run artiq_sinara_test and check that it doesn't fail on the connected devices.
Alternatively, if it would be shipped standalone:
- Switch to external source
- Connect to the external
CLK INclock source (frequency generator) via SMA cable - Power up Clocker with power supply or EEM
- Check via oscilloscope all (internal and external) clocker outputs, that they output clock signal respective to the input frequency
- Shut down Clocker
- Switch to internal source
- Connect clock source to the internal
CLK INvia MMCx cable - Check outputs' signals via steps 3-4