3.0 KiB
Sinara 8452 DSP Stabilizer
EEM is used for power only, and it can be alternatively powered by 12V barrel jack or PoE.
JSON
Not present in the JSON.
Building
Pick your poison - firmware version: older with Pounder support or newer with USB serial console - the first works with a hardcoded MQTT broker and (static or dynamic) IP address, the latter is configured like the booster - through a serial console.
There is no Nix Flake support to make things easier, so you need to set up rust and cargo manually. Start with cloning the stabilizer repository and opening a new shell with dfu-util (for flashing) and rustup (for building).
nix-shell -p dfu-util rustup
Set up the toolchain, this should be done only once:
rustup target add thumbv7em-none-eabihf
cargo install cargo-binutils
rustup component add llvm-tools-preview
rustup update
rustup default stable
Building the older version:
BROKER="MQTT BROKER IP" cargo build --release
BROKER="MQTT BROKER IP" cargo objcopy --release --bin dual-iir -- -O binary dual-iir.bin
Building the newer version:
cargo build --release
cargo objcopy --release --bin dual-iir -- -O binary dual-iir.bin
The newer version must be configured with USB console later (try help command first).
Flashing
Once you have the binary (either built, or received from someone), you can now flash it.
Without firmware on the device or with older firmware, you need to use the jumper method:
- Have the Stabilizer disconnected from power.
- Use a jumper of some sort to short BOOT pins on the board.
- Turn on the power.
- You can remove the jumper after few seconds.
With newer firmware with USB serial console:
- Connect the Stabilizer to power.
- Connect USB cable to the Stabilizer.
- Connect with a serial console emulator, usually at
/dev/ttyACM0. - Input
platform dfuin the console.
And for both:
- The device is now in DFU mode.
- Flash the device with the following command:
dfu-util -a 0 -s 0x08000000:leave -R -D dual-iir.bin
- Look for "File downloaded successfully".
Testing
- Ensure that the firmware has been flashed onto the Stabilizer
- Turn on the crate/Stabilizer via EEM cable or power supply
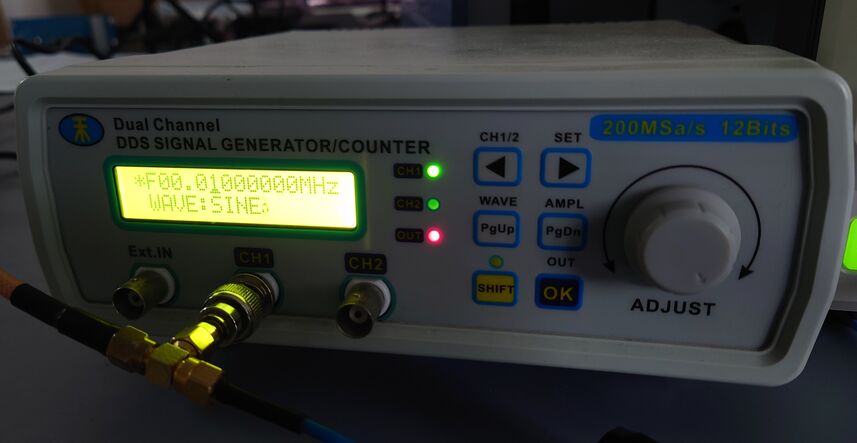
- Set up the signal generator for an amplitude of 1V, frequency of 10kHz, and a sine wave
- Use the splitter to connect the generator's output to ADC0 and to the oscilloscope (refer to the picture below)
- Configure the oscilloscope so that the sine wave is clearly visible
- Connect the second channel of the oscilloscope to the Stabilizer's DAC0
- Ensure that there is the same wave on the second channel, with a small delay, as on the first channel
- Repeat steps 4-7 for ADC/DAC1 (refer to the picture below for connection reference)
