Flickernoise user manual
From Milkymist Wiki
Flickernoise User Manual
Contents |
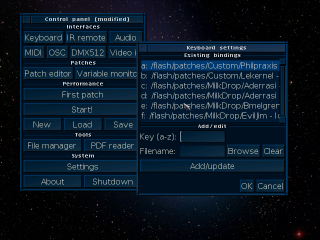
[edit] keyboard bindings
bind keys to different patches. switch them when press the key
[edit] keyboard shortcuts
- Ctrl + Alt + Del : reboot Milkymist one
- long press F10/Middle_Button : shutdown Milkymist one
- press Middle_Button : start Milkymist one
[edit] GUI mode
- Ctrl + F1 : switch screen resolution
- Ctrl + Pause : take Screenshot save to /flash/
[edit] Rendering Mode
- F1/F2/F3 : switch composite video sources
- F5/F6 : video input brightness
- F7/F8 : video input contrast
- F9/Left_Button : previous patch in simple mode
- F11/Right_Button : next patch in simple mode
- Ctrl+ESC : exit rendering mode
[edit] Rescue Mode
press LEFT and MIDDLE at same time will boot to rescue mode, you have to using 'shutdown' in GUI for reboot to normal mode
[edit] What you want
if you have any idea about shortcuts, please send email to devel AT lists.milkymist DOT org
[edit] The Three Buttons
- short press Middle_button start Milkymist one.
- long press Middle_button show slash screen when boot.
- long press Middle_button shutdown Milkymist one after power on.
- press Left + Middle + Right reboot Milkymist one.
- press Middle + Right boot to RESCUE mode, for fix the regular system.
- press Middle + left boot to TEST mode, the screen will like random noise pattern, wait input on serial console.
- Left_Button map to keyboard F9 after boot.
- Middle_Button map to keyboard F10 after boot.
- Right_Button map to keyboard F11 after boot.
[edit] OSC
osc message address and type
     "/midi", "m"
     "/patch", "i"
     "/variable", "if"
     "/osd", "s"
- oscsend 192.168.0.42 4444 /osd s "you are watching Milkymist one"
- oscsend 192.168.0.2 4444 /patch i 1
[edit] Capture screenshot
- At the desired screen view, press Ctrl+Pause key
- Screenshot files will be created as /ssd/Screenshot-xx.png


