| firmware | ||
| hardware | ||
| pictures | ||
| .gitignore | ||
| logo.svg | ||
| README.md | ||
ionpak
A modern, low-cost universal controller for hot-cathode ionization vacuum gauges.
Why?
Many physics experiments require a good vacuum and therefore tools to diagnose vacuum-related problems. Ionization gauges provide a way to measure pressures in the medium to ultra-high vacuum regimes.
While the gauges themselves can be procured quite easily, the controller situation is more problematic. Existing commercial and DIY solutions have one or more of the following issues:
- expensive
- proprietary
- poor performance at low (pA) collector currents
- designed with obsolete components and overly bulky
- lack of gauge voltage/current programmability
- no/poor connectivity to a logging database
- poor design and construction
The ionpak features:
- a single-board low-cost design with modern components
- open hardware and software
- sub-pA electrometer performance
- configurable voltages and emission current to adapt to various gauges
- Ethernet connectivity
Where to find ionization vacuum gauges?
For medium and high vacuum, Chinese gauges can be ordered on Taobao under references ZJ-27 and ZJ-10. The Chinese for ionization gauge is 电离规. Those gauges have a simple construction and an extremely low cost, under USD 10 for glass tubulated models (requires flameworking) and a few times that price for flange-mounted ones. Those manufactured by Chengdu Zhenghua appear to work satisfactorily, and glass gauges arrive sealed under vacuum (around 10⁻⁵ to 10⁻⁶ mbar) so they can be tested immediately. Ceramic sockets for the gauges can often be ordered from the same Taobao vendor.
For ultra-high vacuum, you can use G8130 from KJLC, which is pricy but of excellent quality. There is a lower-cost Bayard-Alpert Chinese gauge ZJ-12, of dubious quality for those pressure ranges, and with 2.5x less sensitivity than the KJLC part.
A low-cost source of quality UHV gauges remains to be found. You can try eBay, but the condition of the items is highly random.
How to connect the gauge?
The collector must be connected with a shielded (e.g. coaxial) cable. If the gauge has a metallic body (e.g. gauges mounted on CF flanges), connect the shield of the cable to the body, so that current from the high voltage electrodes will not leak into the collector electrode. This should not cause any ground loop in your system, as the gauge circuits inside the ionpak are galvanically isolated from its power input and from its Ethernet connector.
If a single cable is used for the filament and anode connections, the anode wire must be particularly well insulated from the filament wires, to avoid leakage currents that can be significant when the gauge is operated with a low emission (100µA or less) and influence the measurement result.
"Domino" terminal blocks from the local hardware store, with the plastic removed, can be used to connect the cables to the pins of CF-flanged gauges. Female circular contacts, such as Amphenol AT62-16-0122, are a nicer alternative but are slightly harder to find.
For baked systems, use PTFE insulated cables that can withstand 200°C. Operating the gauge during bake-out can remove the need to degas it (see the paper Comments on the stability of B-A ionization gages).
It is a good idea to attach the cables to the vacuum system with a strap to avoid damaging the gauge by accidentally pulling on the cables, and to place a cover onto the pins to reduce the electrical shock hazard from the high voltage. Preferably those items should be made of metal so that they can be left on during bakeout.
Using the ionpak
Connect the ionpak to a firewalled Ethernet network only, as it does not provide authentication over the network.
The ionpak has a static IP address that defaults to 192.168.69.1. It has a self-explanatory web interface that you can access by pointing your browser to http://192.168.69.1. By default, the controller is disabled and the ionpak will not produce any output voltages; use the web interface to input your gauge settings and enable the controller.
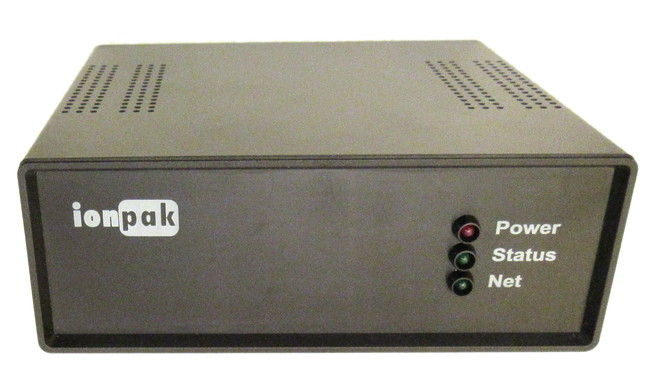
The IP address, along with all the other configuration options, can be reset to the defaults by holding the pushbutton while the ionpak is powering up. The status LED will flash rapidly to acknowledge the configuration reset.
In addition to displaying its measurement results in the web interface, the ionpak exports them in the JSON format. The results are very straightforward to access from Python:
>>> import requests
>>> import json
>>> json.loads(requests.get("http://192.168.69.1/measure.json").text)
{'pressure': 3.8e-06, 'current': 3.357e-08}
In the JSON document, pressure is expressed in millibars and current (through the collector input) is expressed in amperes.
Warning
Ionization gauges use dangerous voltages and the ionpak is capable of delivering a lethal amount of power. Be careful and use at your own risk.
Building and loading the firmware
cd firmware
cargo build --release
openocd -f openocd.cfg
License
Copyright 2017 M-Labs Limited.
License TBD, probably will be CERN OHL and GPL.
Pictures in the pictures folder, except proto_rev1.jpg, are copyright Michelle Poon and not free.